Eskimo has combination of yellowish, brown and ivory color. This is what I will use as color mix.
Before I put the fur I modelled the hood. This is my first attempt. What I wanted are folds but I was not sure how to make them. I used bevel and then selected faces and extruded them inside so it have this folded effect. May be on later stage I will edit it in Zbrush.
Folds attempt.
This hood looks more like a headcloth rather than a hood, that is why I made another attemt by modeling the fur reference piece. What I was struggeling is where to put the fur. Eather to put it directly on the first model "headcloth" or to make something like a reference.
Here I faced one problem I still try to fix.

Here I did not use LayeredShader.
Here I used the Layered Shader and I do not know why in my persp view I can not see the colour but when rendered I see it? Any suggestions why???

Again I hit 02 am. Before I started drawing the hands I will import in Maya I made a quick research. I uploaded some reference images that helped me a lot in putting the vains on the correct place and form the fingers.
Note! As my character is mix of real and cartoon type, I deformed the hands a little bit so they look more interesting rather than too close to reality. I am not a speacialist in anatomy drawings but at least learn what is dorsal venous network. More over who says there are any specific frames when the artist decide to dive in his creations.
Here are the steps to the final images:
According to the reference I made the bones and the hand outlines.

After that I put the veins, again according to my images :)

Then, I used my skin colour reference I made for the face before.

And finally all the drawings and adjusting...
May be these images will be edited on later stage during the modelling but now I can move on and start making them 3D.

They look too wavy!!!..may be need some little editing or these waves might be useful as reference where the veins goes as a relief...No idea...
Here is the profile image of the hands.

Now Im ready to start modelling...
Here are some images of my hands.


Its time for rigging :) so many questions, so many problems, so many issues.....


Here are some images of the final model.
Here is the walrus teeth necklace as well as a close up of the braids.

Here I added some folds on her coat. There are some at the very top of her back but becaus eof the light they are not quite visible.

A close up of the lady's face and hood before adding the fur.


Here I added more folds on her coat.

No I can put some fur on her hood and boots.
Ok, here it is... some polar bear fur. Here are some test images. What I find is that it is very difficult to deal with this fur in Maya.

Awfull!!!

What I did, was detaching piece by piece, then applying the fur, but when decided to combine the pieces again the fur just disapearsp. Then after combining them I applied the fur again and here it is. The hair doesnt look like a hair but some steel chains...Im gonna change the colour. Here the left side steel does not look quite good.

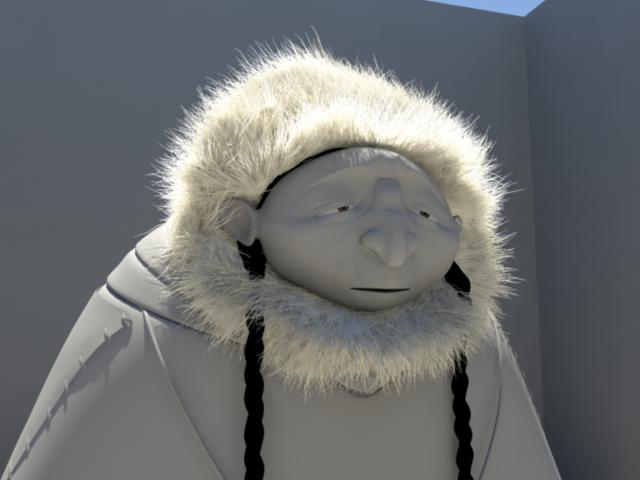
Here I changed the hair colour but now it looks like a rubber. Anyway, the fur here looks nice. My main concern was that the fur will hide the braids. But I reduced the density and using the Fur Tool position them away from the braids. Here I believe it looks natural as usually the fur hood hides part of the hair and face. still there is something wrong with the left side.

again some troubles


The full rigging and animation piece soon!!! Still WIP!